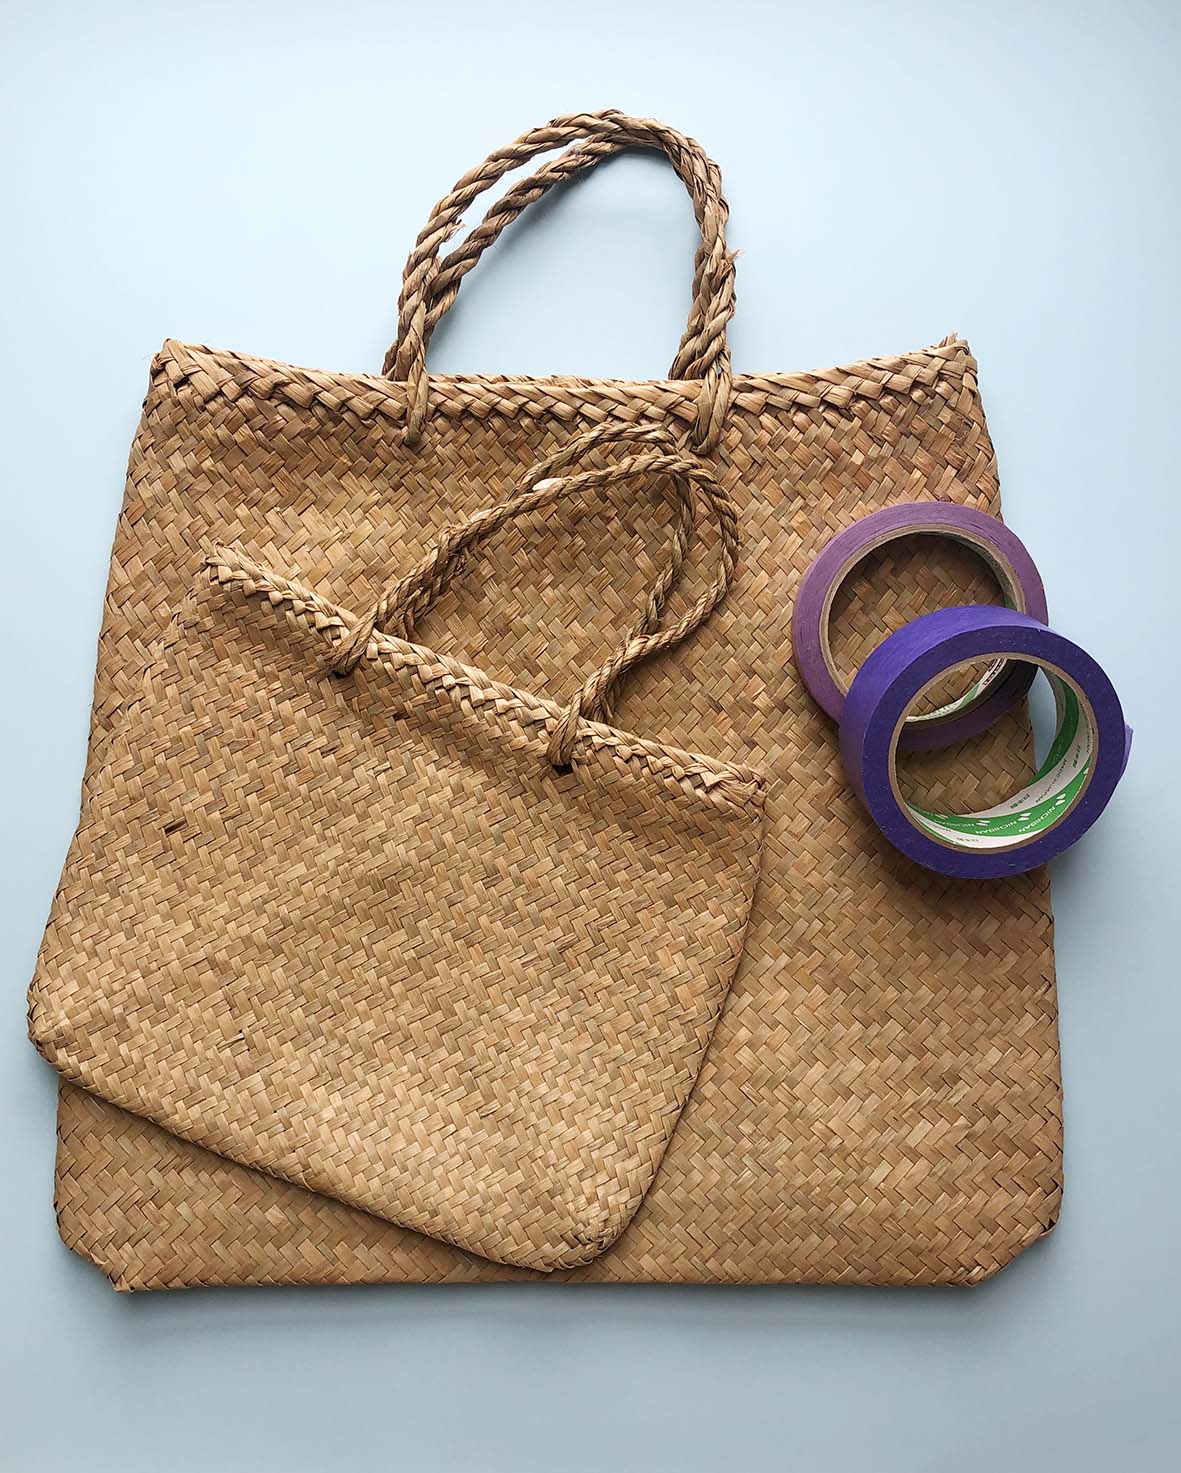
Pompoms and paint turn inexpensive woven bags into one-of-a kind holdalls.
What you need
- Woven bags
- Removable tape in various widths
- Scissors and ruler
- Resene art brushes
- Fork for pompoms
- Colourful wool
- Large needle
- Twine
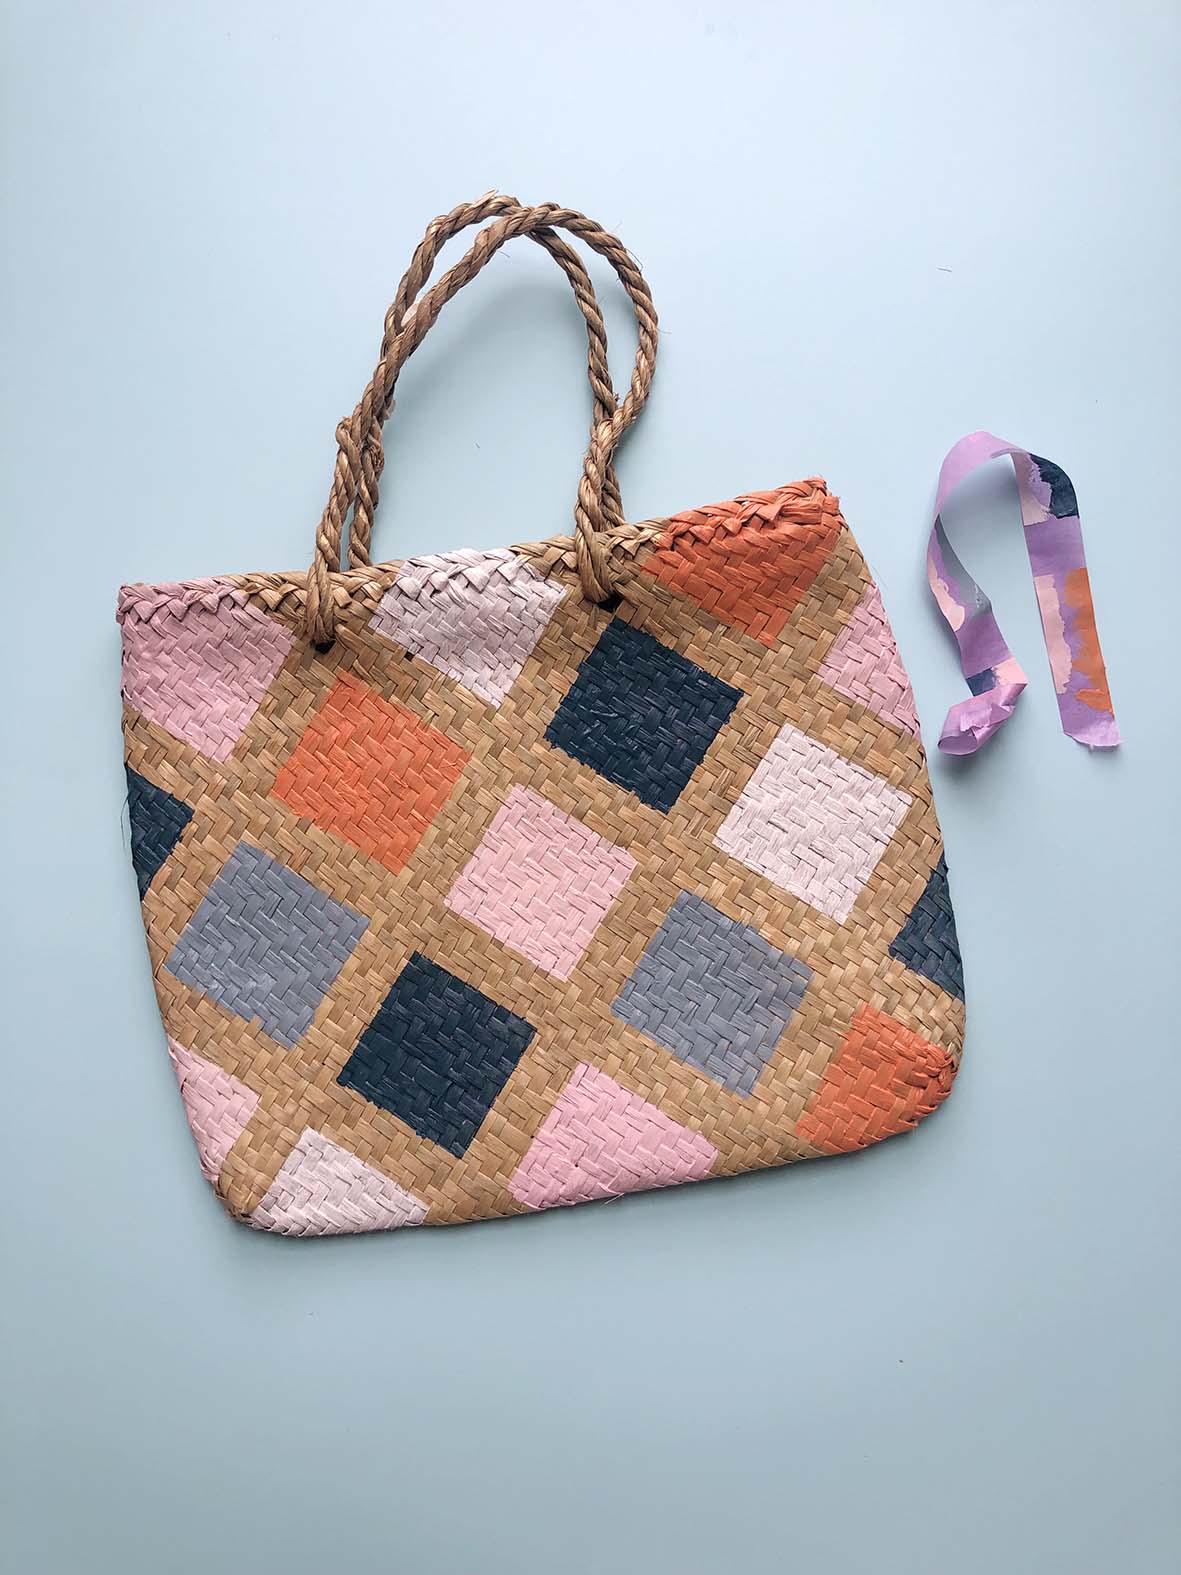
Diamond bag colours
- Resene Madison
- Resene Lynchpin
- Resene Jailbreak
- Resene Paper Doll
- Resene Ebb
Striped bag colours
- Resene Half Forest Green
- Resene Soft Apple
- Resene Ming
- Resene Paradise
- Resene Paper Doll
- Resene Lynchpin
- Resene Jailbreak
Steps
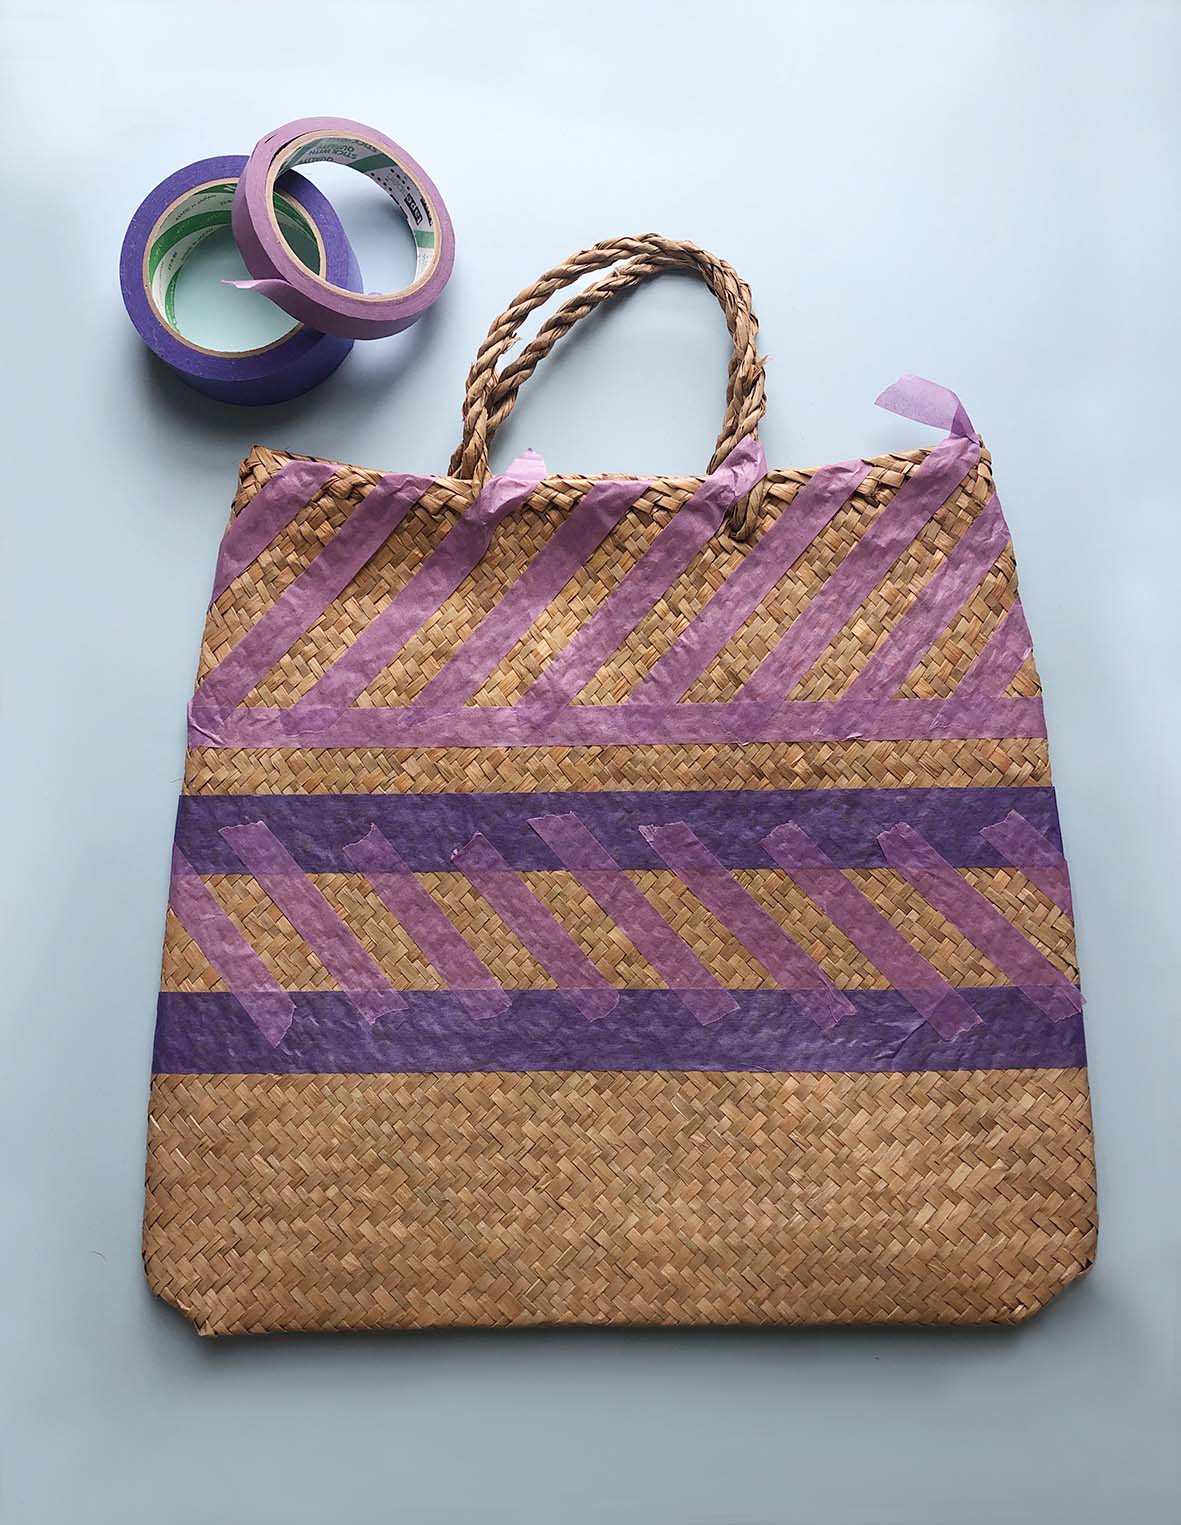
1. To create the diamond pattern, place the removable tape criss-crossed in diagonal lines. (B) To make sure the pattern will be even, measure the space between each line of tape so the gap is exactly the same.
2. Press the tape down firmly so the paint doesn’t bleed underneath. (C)


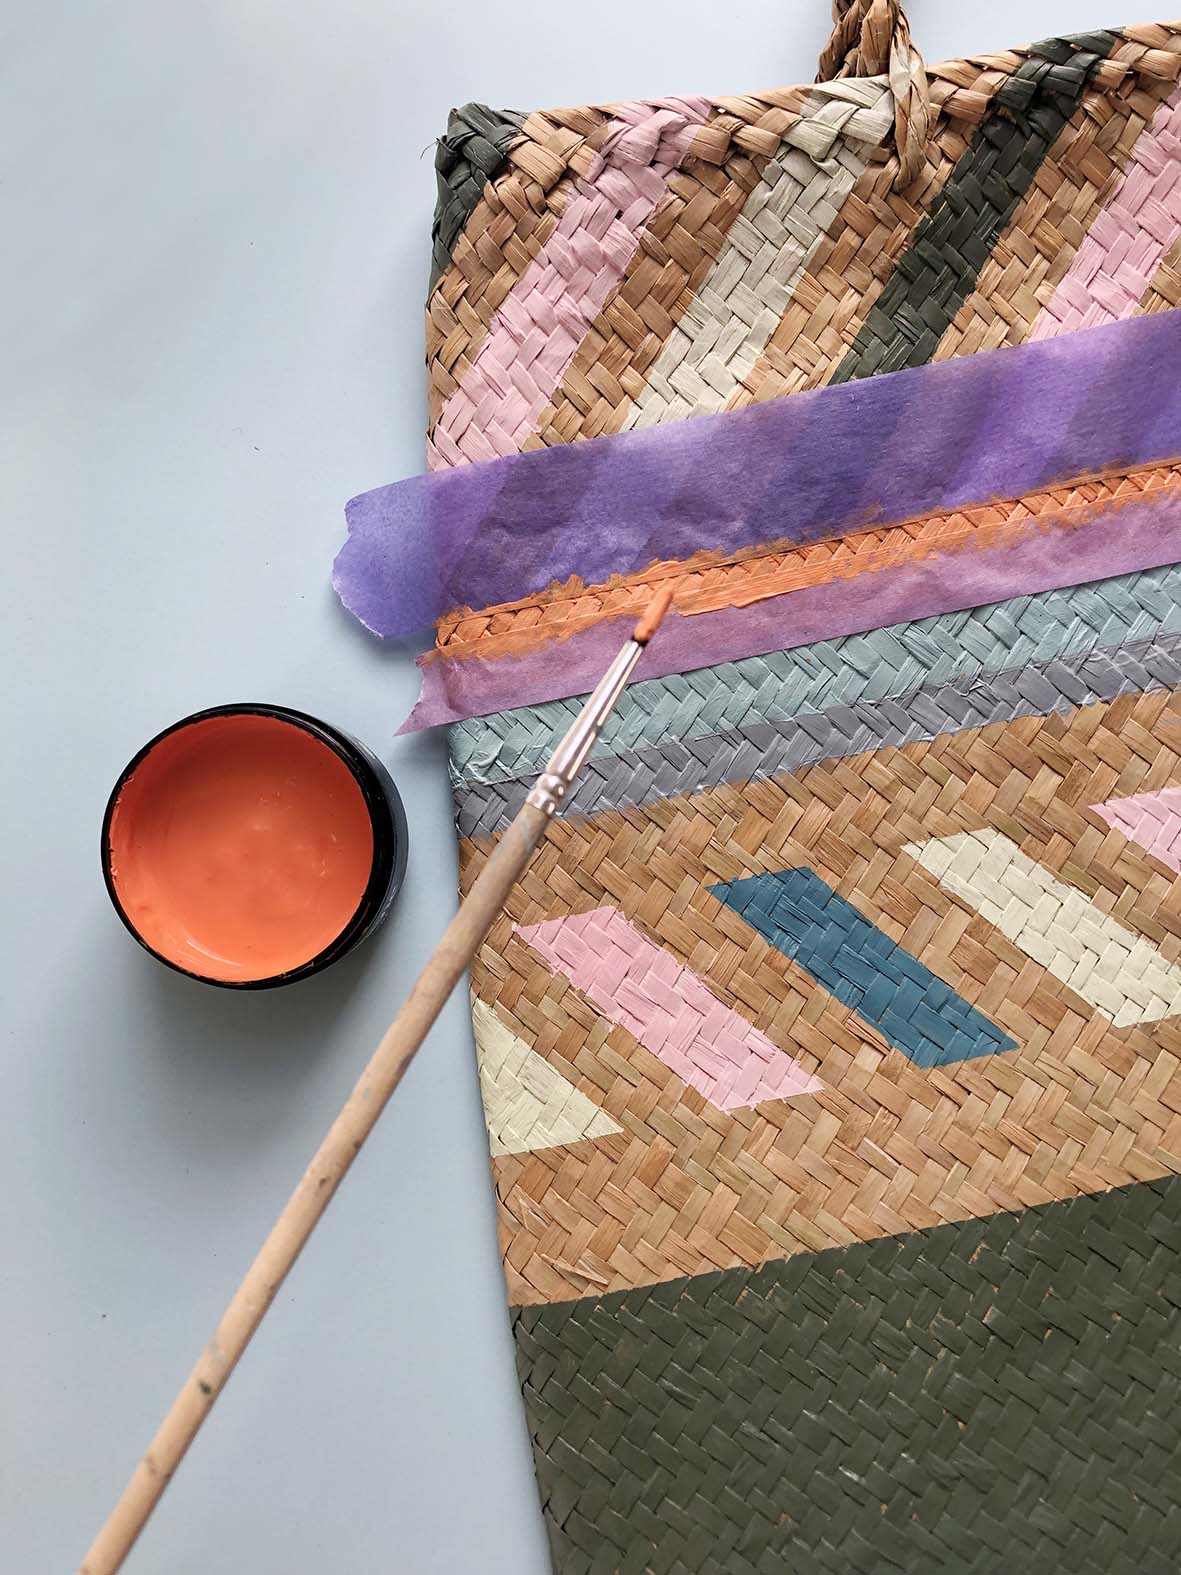
3. Paint each diamond shape using the five Resene colours listed above. Alternate the colours so each diamond is a different colour from the one closest to it. (D)

4. To create the striped bag, use the same steps to tape and paint the bag, except this time use different widths of tape to create varied patterns. (F-I)


To create thinner lines with no space between the colours (like the orange one painted in Resene Jailbreak) wait until the first coat has dried completely, then tape more lines and paint. (J)

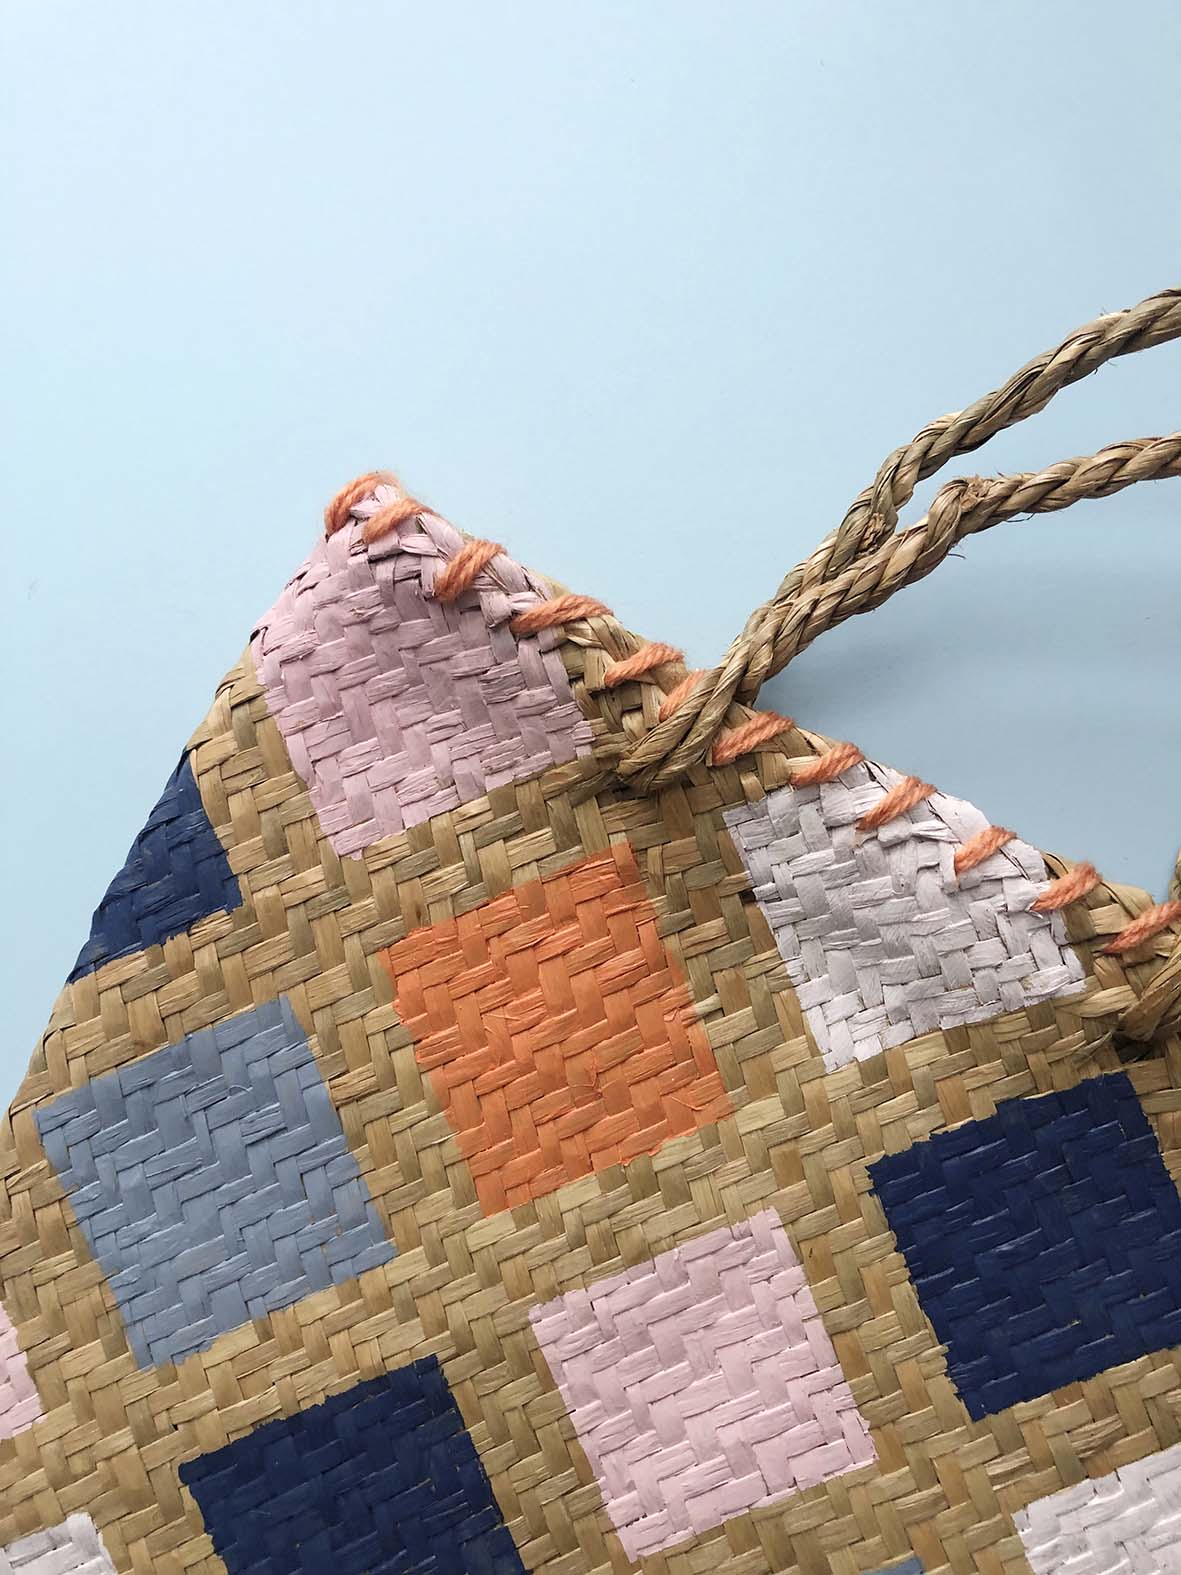
5. To create a coloured wool edge, double the wool (K).
And use a large embroidery needle to loop up and over the edge of the bag, leaving about 1cm between each loop. To secure, tie a knot at the start and finish, on the inside, so the knots are hidden. (L)
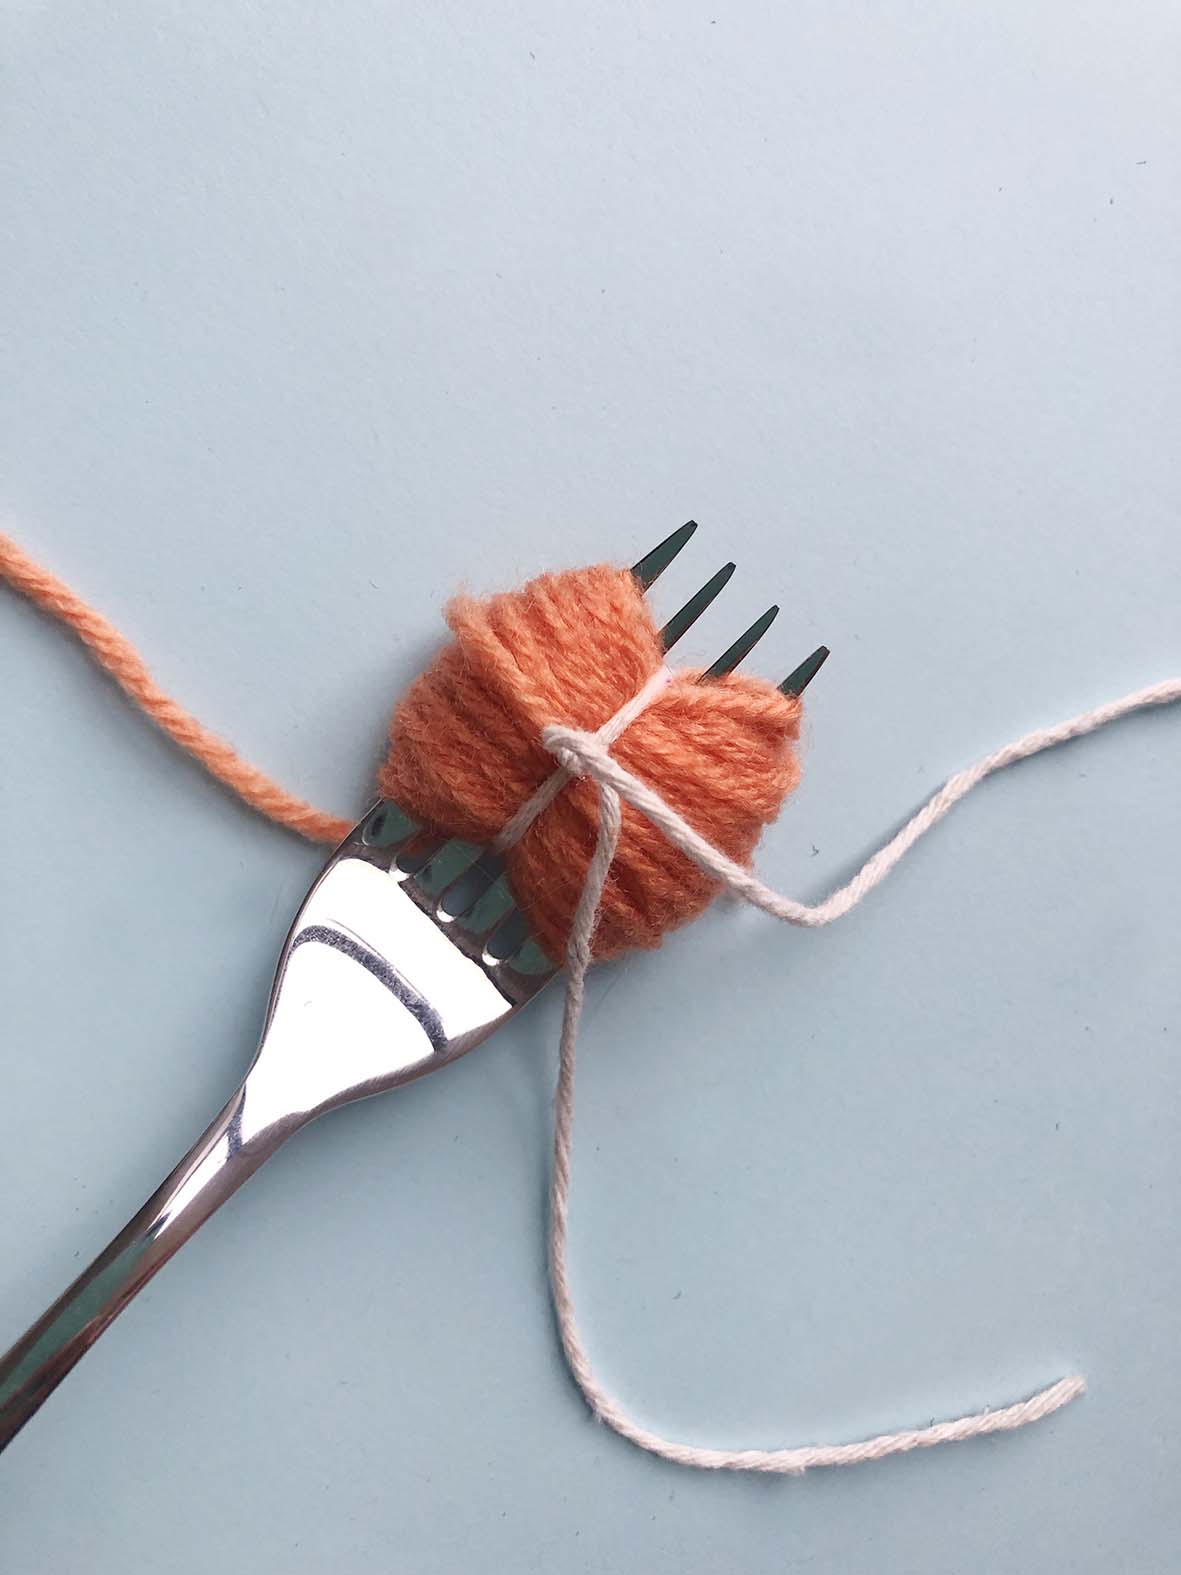
To make the pompoms
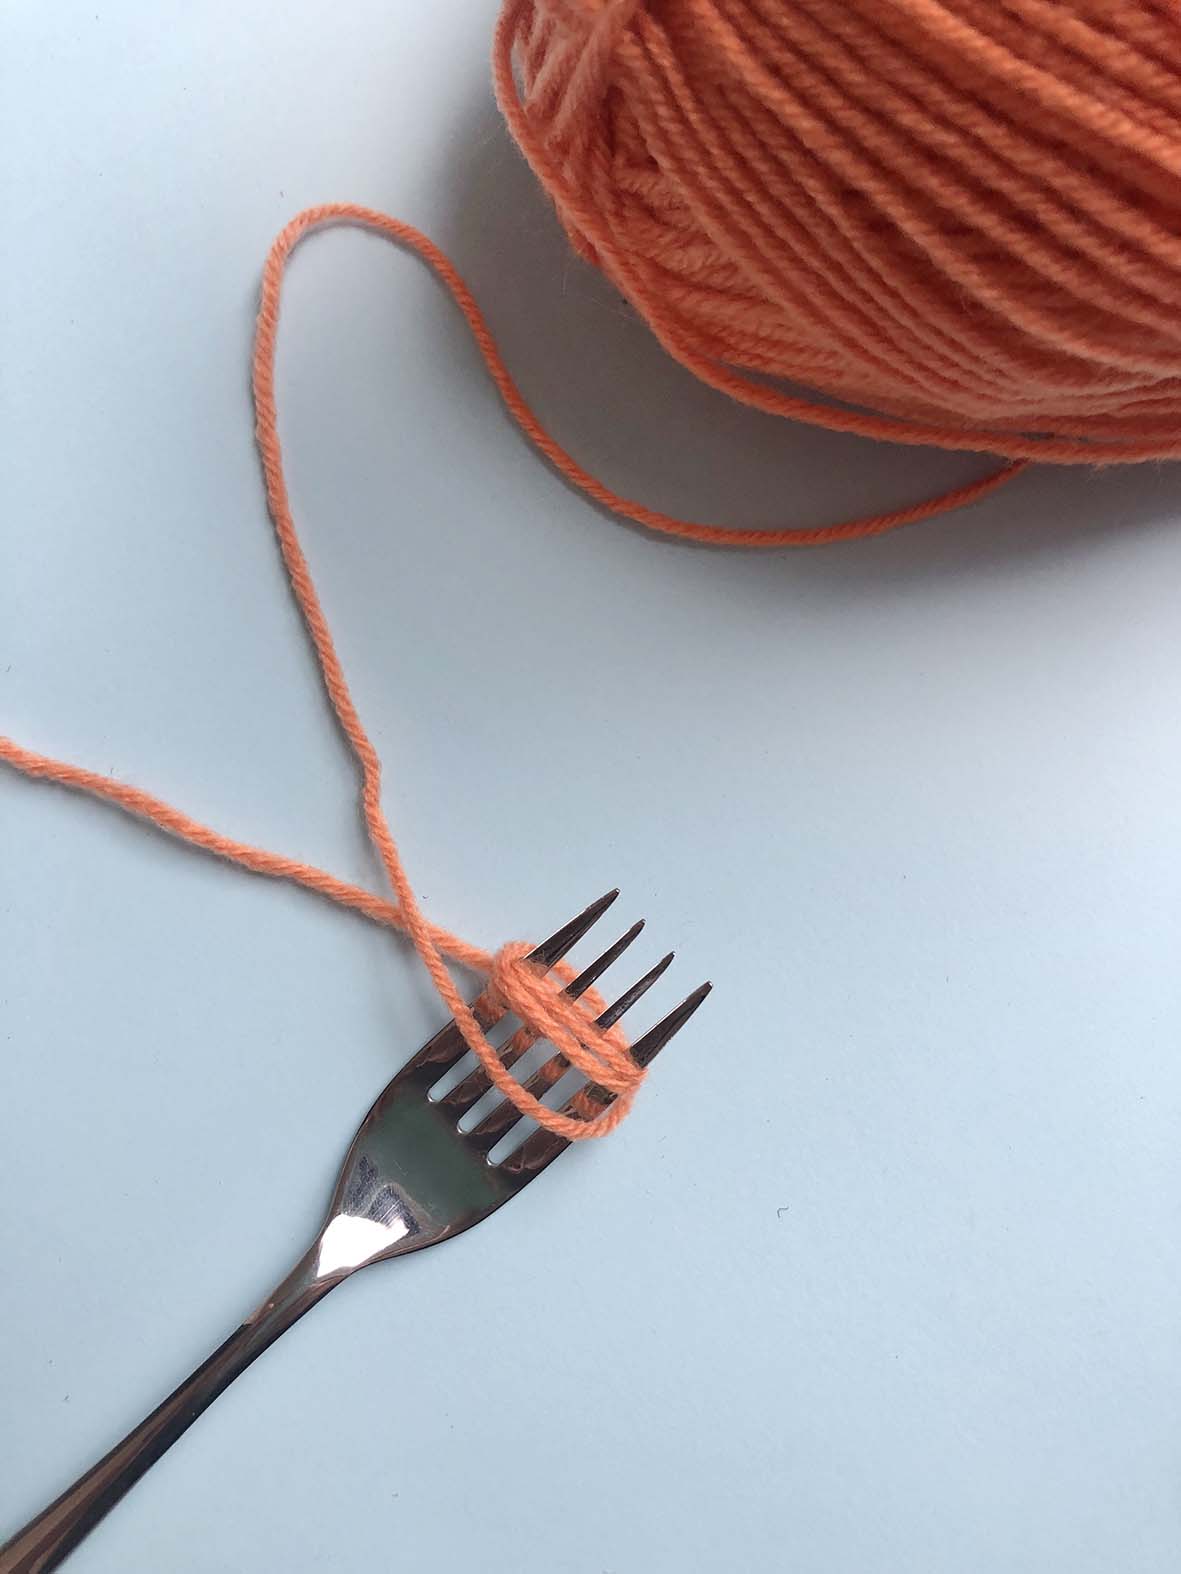
1. To create small, cute pompoms, you can simply use a fork. If you want to make larger ones, wrap the wool around a larger object.
2. Wrap wool round and round the fork (A).
Continue to add as many layers as the fork will hold. (B) The more wool you have, the fuller the finished pompom will be.

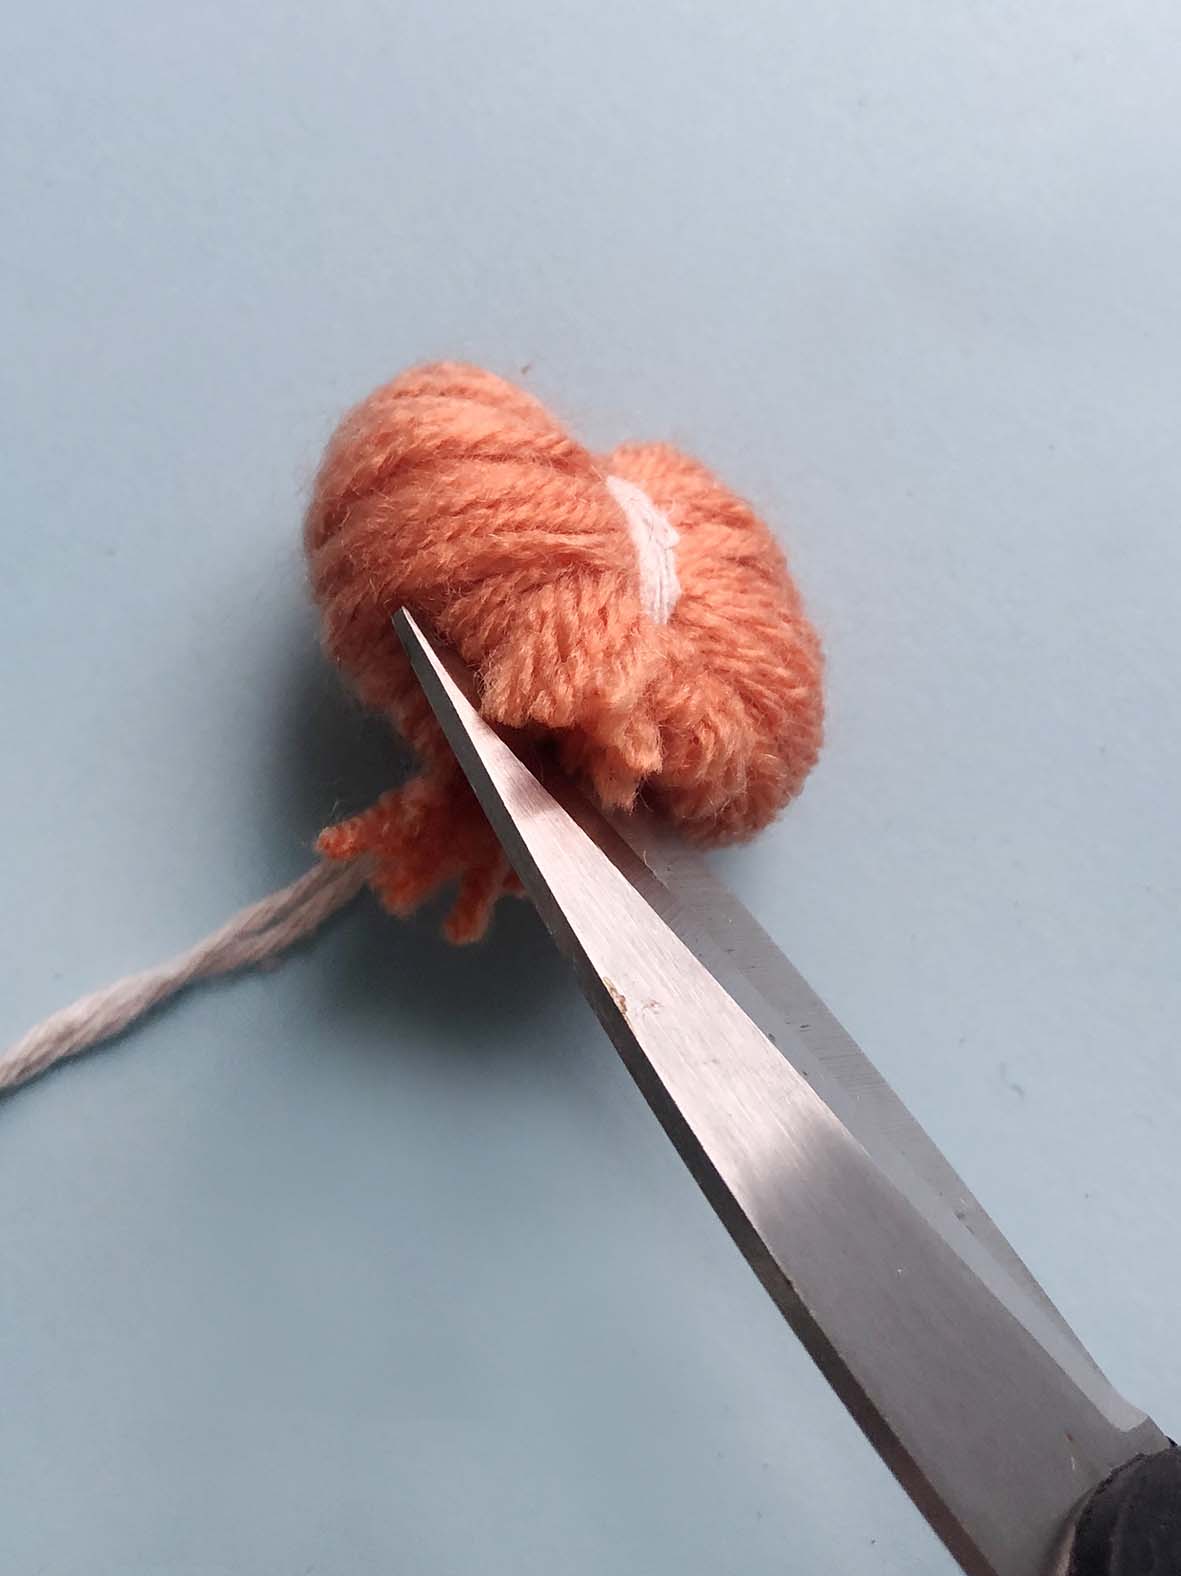
3. Use a piece of stronger twine to wrap and tie the centre of the pompom. (C)
Tie a double knot as tightly as possible (leaving enough twine to attach to the bag) then slide off the fork. (D)

4. Cut all the way around the curved edge, avoiding the centre twine, then tease out the wool. (E)
Trim to create an even circular shape (F) and tie to the bag.